Tools on Attribute Table
|
At the bottom of the map, there is an expandable section that will allow access to the attribute information. There are tools to select, filter, refresh, and export to .csv for any layer visible in the map extent and zoom level. |
 Attribute Table
Tool Bar
As shown in Figure.1, the Attribute Table provide users with several handy tools.
![]()
Figure.1
Small Tools
- Clear Selection
- Click on
 button to deselect the selected feature(s).
- Refresh
- Click on
 button to refresh the Attribute Table.
- Filter by Map Extent
- By default,
 is turned on, which means that the number of features on the Attribute Table is limited by the current map extent.
 - Turn off
 by clicking on it. Notice that more features will show up.
- Zoom to
- After selecting a feature(s), click on
 and map will zoom to the selected feature(s).
Options
Click on ![]() button to open a dropdown list of tools, as shown in Figure.2.
button to open a dropdown list of tools, as shown in Figure.2.
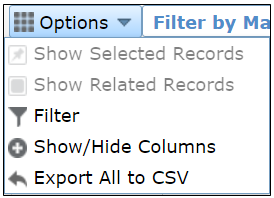
- Show Selected Records
- Select a feature(s) on the table, and click on
 on the dropdown list. Only selected features will show up on the table.
 - On the dropdown list, the
 option will become
  . Click on this option to display all features without deselecting those selected features.
 - Click on
 button to deselect the selected feature(s) and display all features.
Note that if you have not selected any feature, this tool will be disabled.
- Filter
Click on ![]() on the dropdown list to open the Filter window.
on the dropdown list to open the Filter window.
- Add a filter expression
- Click on
 on the Filter window to add a filter expression. This tool allows you to add multiple filters simultaneously by clicking on
  multiple times. To remove a filter expression, simply click on
  at the top right corner of the filter item.
 - On the filter expression as shown in Figure.3, click on the expand arrow for the first field to open a list of column names as shown in Figure.4. Click on the one you would like to choose.

Figure.3
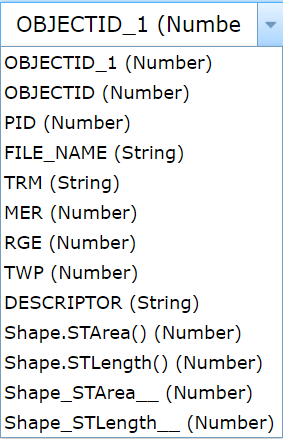
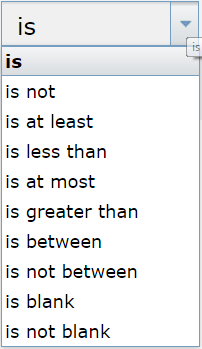
Figure.4
- Click on the expand arrow for the second field to set a condition, as shown in Figure.4. Click on the one you would like to choose. If you choose “is blank” or “is not blank”, no more input field will show up.
- Choice 1 – Enter value: select the radio button for Value, and enter a specific value into the input field.
Choice 2 – Pick from existing field: select the radio button for Field, an expand arrow will appear on the right of the input field. Click on the expand arrow, and pick one item from the dropdown list.
Choice 3 – Pick from unique values in selected field: select the radio button for Unique, an expand arrow will appear on the right of the input field. Click on the expand arrow, and pick an unique value from the dropdown list.
- Add an expression set
- Click on
 on the Filter window to add an expression set. This tool enables you to add multiple expression sets simultaneously by clicking on
  multiple times. To remove an expression set, simply click on
  at the top right corner of the expression set item.
 - An expression set is essentially a set of filter expressions, as shown in Figure.5. By default, there are two filter expressions in a set. It allows you to add more filter expression by click on
 locating right beside
  at the top right corner of the Filter window.
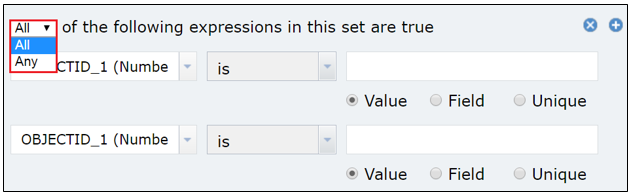
Figure.5
- Depending on whether you would like All or Any of those expressions to be true, click on the expand arrow at the top left corner on the window, select the option you want, as shown in Figure.4.
- Once you complete adding filter expression(s) and/or expression set(s), click on
 on the Filter window. Then only feature(s) which fulfill the filter will appear on the Attribute Table. To make modifications to your filter, simply reopen the Filter window and make any changes you need.
- Show/Hide Columns
- Click on
 on the dropdown list or
  at the top right of the Attribute Table (locating below the tags). A menu of columns will pop up on the right side of the Attribute Table, as shown in Figure.6. By default all checkboxes are checked.
 - Once you uncheck a checkbox, the corresponding column will disappear on the table immediately. Similarly, if you check a box, the column will pop up right away.
- Click on
 again to hide the menu.
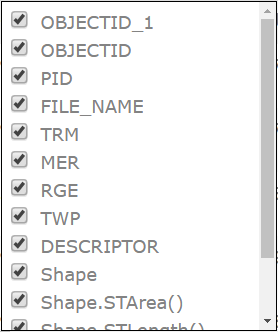
Figure.6
Created with the Personal Edition of HelpNDoc: Revolutionize Your Documentation Output with a Help Authoring Tool