How do I print a map?
By combining map panning, zooming, and mark ups like redlining, you can create a custom map of any location in the county and have it rendered as a PDF. During the print preview you have option to include map features, such as title bars, legend, scale bar, north arrow, and more.

![]()
 Open the Printing Tool by clicking on the printer icon in the top right hand corner of the Web Map display window.
- Customize Map Title, Layout and Format – on the dropdown window of ‘General’ settings, you change the Map Title, Layout and Format of the map. (Figure.1)
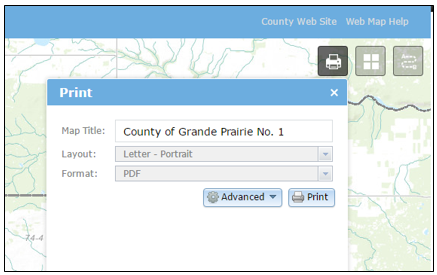
Figure.1
- Choose to preserve Map Scale or Map Extent in printed map – click on the ‘Advanced’ button, then in the dropdown window you can choose if the printed map will preserve Map Scale or Map Extent. (Figure.2)
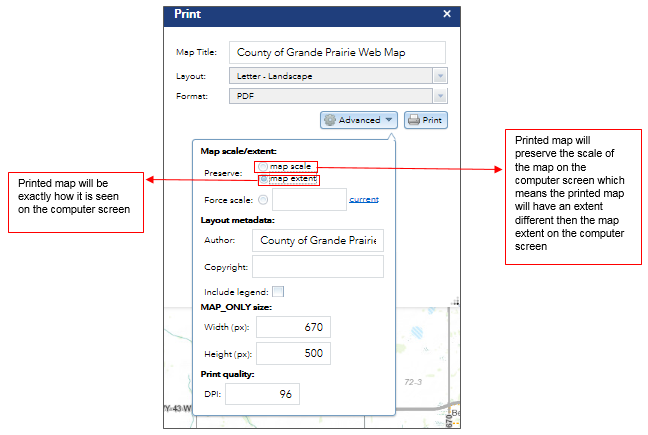 Figure.2
- Customize Map Size, Layout metadata, and Print quality – click on the ‘Advanced’ button, then in the dropdown window you can change Map Size, Layout metadata, and Print quality. (Figure.3)
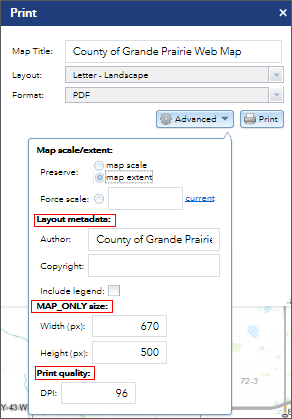
Figure.3
- Print the map - Generate a map by clicking on the ‘Print’ button. (Figure.4) This usually takes a few seconds to create a map.
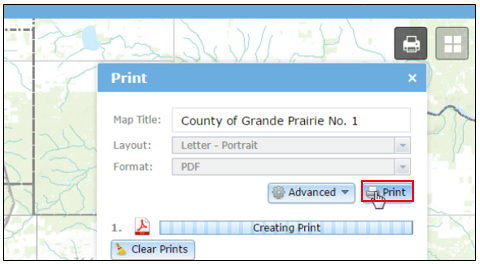
Figure.4
- View the map Pdf Document - click on the map. (Figure.5) The map will open in a new browser tab as a PDF document, if another format has not been specified. Print the pdf from the browser or save the pdf to your desktop.
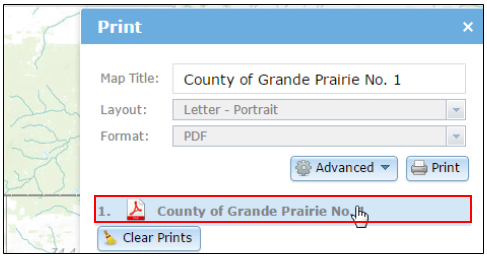
Figure.5
- Clear Prints - Click on the ‘Clear Prints’ button to clear all the generated map files.
Created with the Personal Edition of HelpNDoc: Make Help Documentation a Breeze with a Help Authoring Tool