How do I Draw on the Map?
|
The Draw tool allows you to create a custom map with unique notes or drawings to enhance and highlight areas. |
|
General Drawing Procedure
![]()
- Open the drawing tool:

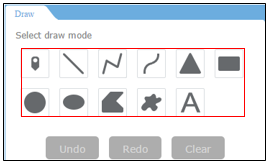
- Select the desired draw mode by clicking on the symbol type, as shown in Figure.1.

Figure.1
- Select the symbol for the feature using the symbol picker in the Drawing Tool.
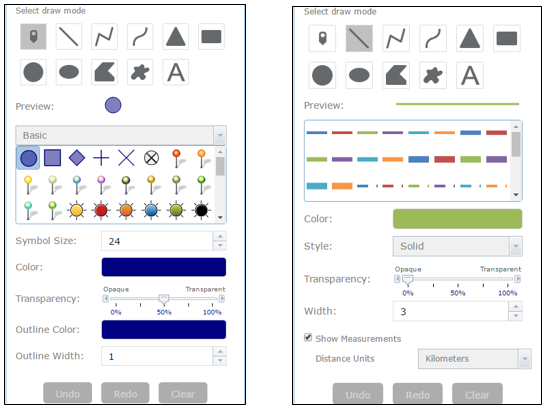
- For Point symbols, select the Marker Category (different symbols are available in each category), Symbol Size, Color, Transparency, Outline Color, and Outline Width of the symbol, as shown in Figure.2.
Note that only the Symbol Size is available for the picture marker symbols (all symbols except the first 5 symbols).
- For Line symbols, select a pre-defined symbol from the box. Customize the Color, Style, Transparency, and Width of the symbol, as shown in Figure.2.
If you want to display the length with the line, check the Show Measurements checkbox, and select a unit from Distance Units. By default, the unit is Kilometers.
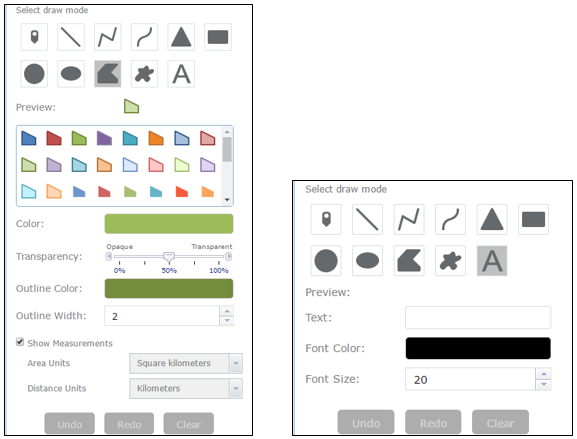
- For Polygon symbols, select a pre-defined symbol from the box. Customize the Fill Color, Transparency, Outline Color, and Outline Width of the symbol, as shown in Figure.2.
If you want to display the area and outline length with the shape, check the Show Measurements checkbox, and select units for measurement. By default, the area is in Square kilometers, and the distance is in Kilometers.
- For Text symbols, enter the Text to be drawn, and select a Font Color and Font Size for the symbol, as shown in Figure.2.
- Draw features or texts on the map.


Figure.2
Notes
![]()
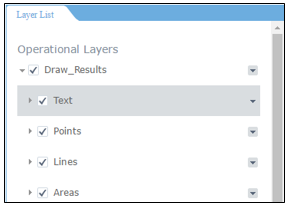
- After drawing any features or texts, a Draw_Results layer will appear under Operational Layer, as shown in Figure.3. To view or perform any operations on this layer, use the Layers Tool.
- On the Drawing window, click on Undo/Redo to undo/redo the drawing features.
- On the Drawing window, click on Clear to remove all of drawn features.

Figure.3
Created with the Personal Edition of HelpNDoc: Free Kindle producer